Here's How My Private Clients Consistently Get Leaner & Stronger Month After Month, Without Getting Hurt By Their Kettlebells, Even If They've Been Injured In The Past...
I simply show them some of my
"Olympic Lifting 'Neuro' Secrets"
and we apply them to their kettlebell workouts!
If you'd like, I'd be happy to show them to you too.
Dear Kettlebell-Swinging Friend,
Kettlebells are cool, aren't they?
Nothing like the burn in your lungs... the screaming in your gluts and hamstrings...
... And the feeling like you got a good sweat from a great kettlebell workout, am I right?
I got my first set of kettlebells back in January 2002 - the "Starter Set" - the 4kg, 8kg, 16kg, 24kg, and the 32kg.
And I started training my personal training clients with them almost immediately. After all, I was an Olympic lifter - a State Champ, who'd just qualified for the Nationals a couple of years before...
I knew what I was doing...
... Or so I thought...
One of my current clients, whom I've trained since 2001, still jokes with me about how we thought the bruises on the backs of our forearms and shoulders, where the kettlebell slammed into them...
Were "Badges of Honor" from their use - Seriously Hardcore.
How times have changed...
Back then, there was ONE resource on how to use kettlebells - the Russian Kettlebell Challenge - a VHS tape and book...
Which quickly became a 3-day "how to use kettlebells and teach them to others" course, called the RKC.
Nowadays? It's -
Information Overload!
Kettlebells are everywhere!
And everyone it seems has an opinion on how to use them.
There are 1.73 MILLION Google results alone for "How To Kettlebell Swing!"

Who's got time to search through all that?
Let alone test everything out to make sure your form is ok...
... And if it's not, you might not know until you hurt your lower back, neck, shoulder, or wrist!
And what about if you want to learn how to do the other basic single kettlebell exercises correctly?
More "YouTube University?"
Or maybe you can hire a local kettlebell instructor for $65 to $100 an hour for an in-person lesson...
... The personal touch is great, but you better hope you can remember all the cues you're bombarded with to maintain your technique...
... And you better hope that your instructor can communicate clearly and effectively to make the most of your time...
... Otherwise, if you're budget-conscious, you can rack a up a pretty hefty bill...
Not to mention hiring a Master Instructor - one who teaches the kettlebell instructors how to become kettlebell instructors...
There has to be a better, faster, cheaper way to make sure your kettlebell exercise technique is spot on...
Fortunately...
I Learned The "Hard Way" So You Don't Have To
Just a quick bit of background about me in case we don't know each other very well...
My name is Geoff Neupert.
I've been training people to "get in shape" - whatever that means to them - get leaner, more muscular, stronger, faster, be a better athlete -
Since 1993.
I've had the good fortune to train all kinds of people, of all ages, from all walks of life -
College athletes, Regular Joe's & Jane's, arthritic grandmothers, U.S. military special forces units, post-rehab knee, shoulder, & lower back patients, other coaches and trainers, and everyone in between.
I was Strength & Conditioning Coach at Rutgers University where I trained athletes to be stronger, faster, and better conditioned so they could compete and win in Division 1 athletics.
I've owned and operated several personal training businesses, where I helped businessmen and women, high school athletes, stay-at-home moms, get leaner and stronger.
And most importantly to you, I've not only trained people with kettlebells since 2002...
I was a Master Instructor in two different kettlebell education companies - The RKC and StrongFirst, where I taught other kettlebell users all over the world - how to become kettlebell instructors. (I was also the Education Manager for StrongFirst, in charge of certification material.)
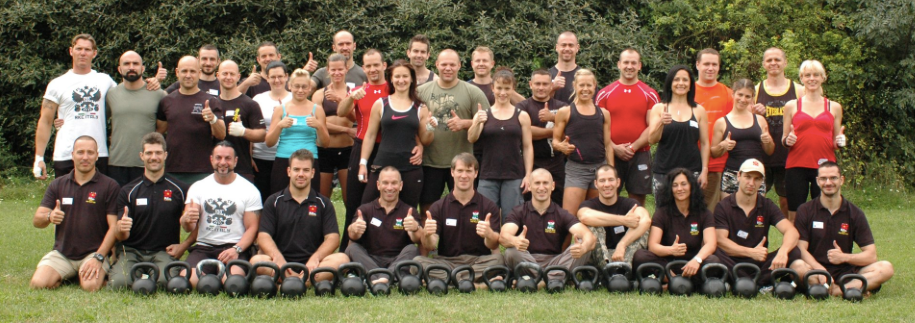
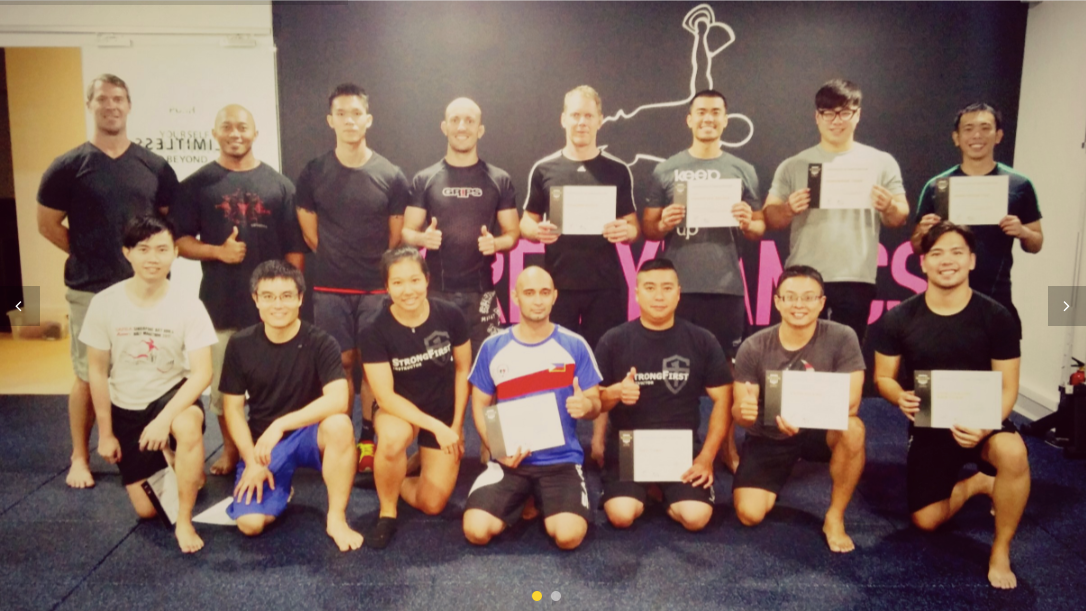
I also routinely held my own kettlebell and "body restoration" certifications across the U.S. and Italy, Czech Republic, Singapore, and Australia from 2011 to 2016, when I retired the first time from the industry.
I've also authored or co-authored several books and had a booming online kettlebell training program business from 2009 to 2016.
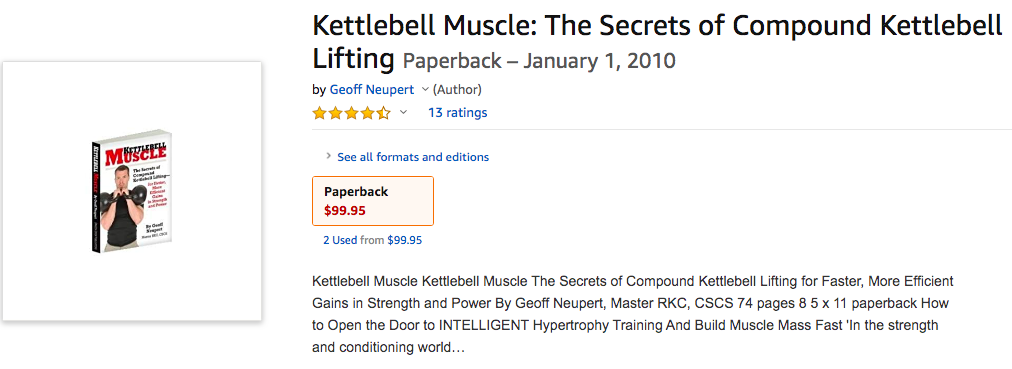
And I've authored articles on popular sites like MensHealth.com, MensFitness.com, MensJournal.com, Bodybuilding.com, T-Nation.com, DragonDoor.com, and StrongFirst.com.
I don't share any of this to brag or try to impress you -
Rather, to impress upon you that I've been around for a long time and other people just like you trust me to help them get the results they're looking for.
Furthermore...
Between 1989 until 2012, I struggled with the results of a near-catastrophic knee injury from wrestling.
This injury subconsciously changed the way I moved...
... Which along with abdominal surgery, later caused several severe lower back injuries, two hip injuries, kept me in constant pain in both my knees.
And it kept me from my beloved sport of Olympic Weightlifting.
In 2012, I finally got 95% free - or "Good Enough" as I like to say -
To play with the lifts again.
And in 2015, 6 weeks shy of my 43rd birthday, I actually competed again in the sport of Weightlifting, even though the week of I missed 4 nights of sleep (because I had to take my wife to the Emergency Room) and lost 10 pounds.
The results were amazing - Zero knee pain during or after the meet!
So I took the most important things I knew from kettlebell training, my "body restoration" certifications, and my Olympic Weightlifting training, and packaged it into this online, digital video kettlebell instruction course.
Here's why that's so important to you -
You Can Get Leaner And Stronger, Faster, While Staying Injury-Free By Refining Your Kettlebell Technique
That might sound like a stretch, I know.
And I wouldn't have believed it myself if it weren't for the fact that I've had to change my technique for Olympic lifting several times to accommodate my injuries...
Shoot, I even became a Certified Kettlebell Instructor back in 2005 because even though I could lift almost 400 pounds over my head, I couldn't swing a 32kg/70 pound kettlebell without lower back pain!
Think about it -
All great athletes spend time refining the techniques of their sports -
Sprinters, runners, throwers, hurdlers, football, basketball, and soccer players...
... You name it, all of them spend time practicing the basics of their sport.
It's the same with kettlebell training too.
However, unlike pro-athletes who seem to have all the time (and money) in the world to practice and train -
We have to make the most of our time because we don't get paid to play sports, lift weights, or get in shape.
So we need to be as efficient as possible.
You need a way to refine your kettlebell exercise technique so that it doesn't take hours of practice, cut into your busy social life, or sap your energy.
And that's why I took the most important techniques, concepts, and exercises I learned in over 25,000 hours of 1-on-1 personal training sessions, 10 years of teaching kettlebell and "body restoration" workshops and certifications, and God-only-knows how many hours of tinkering in my own rehab, restoration, and Olympic lifting training...
"Secrets" I learned that "hack" your nervous system to get faster-than-normal results...
Systematized them, and put them into -
"THE BIG 6"
Video Series

It’s 5 hours and 41 minutes of cutting edge, in-depth, “Workshop Style” videos, filmed in HD and digitally edited, that you can watch anywhere you want - at home, in the gym, in your office (only on break, of course - or if you’re the boss), at the beach… Anywhere .
Download them and save them to your desktop computer.
Or watch them on your tablet or smart phone.
There are 7 main sections and 53 step-by-step videos in all.
That may sound like a lot, but we edited them that way so you can reference them quickly and easily, by exercise.
That way you don’t have to spend 25 minutes wading through video to get to the part that you really need now .
You simply click on the video you want, get the information you need - and BLAMMO!
You just fine-tuned your Swing technique.
And, you know it worked because you feel your glutes, hamstrings, and abs, like you never have before.
In fact, as far as I know, there’s nothing on the market like it!
Sure, there are some one hour or even 90 minute videos here and there, demonstrating basic techniques, but nothing goes into the depth and breadth of detail for single kettlebell training like THE BIG 6.
“Workshop Style” allows you feel like you’re actually in a kettlebell workshop, without the hassle of travel, and the “one-time” only experience, where you have to take great notes or rely on your “elephant-like” memory.
Each lift is explained, broken down into pieces, and you get to watch “guinea pigs” - workshop “participants” - learn and correct in real time.
“Workshop Style” allows you to pause each video after each segment, just like if you were at a live workshop.
The best part is, that unlike a live workshop, with these videos you can watch the segments you need the most help with over and over and over again, without having to worry about missing anything else or getting left behind by the instructor as he progresses through the workshop.
Here’s What’s Inside
“THE BIG 6”…
Sections 1 and 2 are the intro and a quick disclaimer about safety.
Then we jump right into the meat -
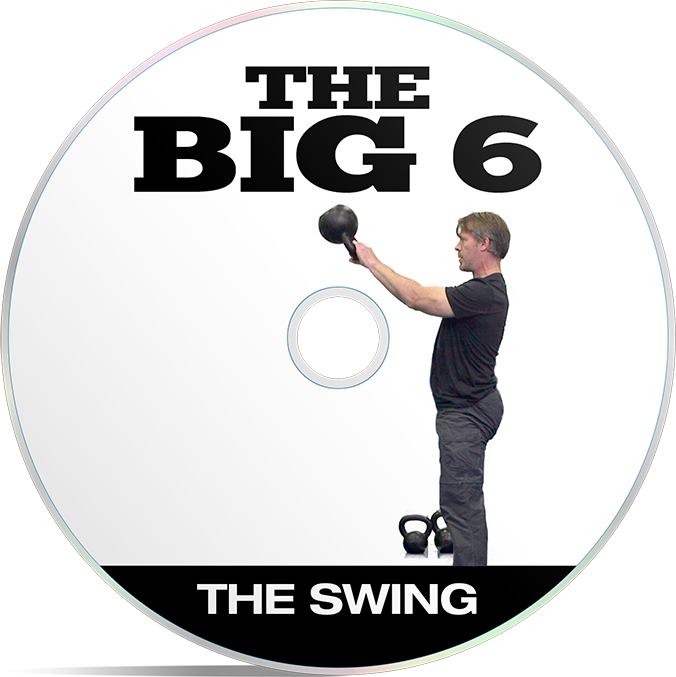
SECTION 3 - THE SWING
- Setting up the 2 Hand Swing
- Why to “begin with the end in mind” and what that looks like
- What’s the role of your arms in the Swing?
- A simple yoga drill and it’s variation to re-enforce the Swing lockout positions
- How to find and set up the backswing and why it matters
- Finding and folding into your hips
- How to load your hips and what you should feel when doing so
- The key indicator to know if your hips are working properly
- A simple drill to ensure you can find your Swing position (conveniently it also mobilizes your hips and trains your lower back to maintain a safe position)
- Optimizing your positioning: Foot position and stance width and where the pressure should be in your foot
- How to fold into your hips properly to protect your lower back
- Discover the “ideal” head position: Up, down, yes, no… Where to look on your swing…
- The importance of chest position and spine mechanics for protecting your lower back
- The relationship between the hips and the shoulders and why it matters for a more powerful swing and a happy lower back
- 3 steps to fine-tune the backswing position for more powerful Swings and a happy lower back
- Find the “Power Position” for more explosive Swings - and the simple drill to find and pattern it
- Discover the “key principle” for safe and efficient kettlebell training
- The simple drill way to get the kettlebell into the backswing (makes you “almost want to do the Swing…”)
- Learn the position of the kettlebell in relationship to your body on the set up (It’s different for each person, depending on their body’s structure)
- Kettlebell set up: Optimum hand placement in relation to the rest of the body
- Mastering the Hike Pass for a powerful backswing and a safe body position
- Simple 3 step drill for the perfect backswing (this sets up powerful swings)
- Learn the best way to breathe during your Swings
- How to keep from swinging with your arms: 2 simple fixes
- How to “break the rules” to perfect your technique
- How to keep your shoulder locked to your body during the 1 Hand Swing so it doesn’t get yanked on the backswing
- The best Swing variation to teach the “float” (also great for “distracted” conditioning)
- “Real Time” Troubleshooting with our BIG 6 “guinea pigs” so you can see technique changes in others from implementing what’s in these videos and be encouraged yourself
- And much, much , much more!
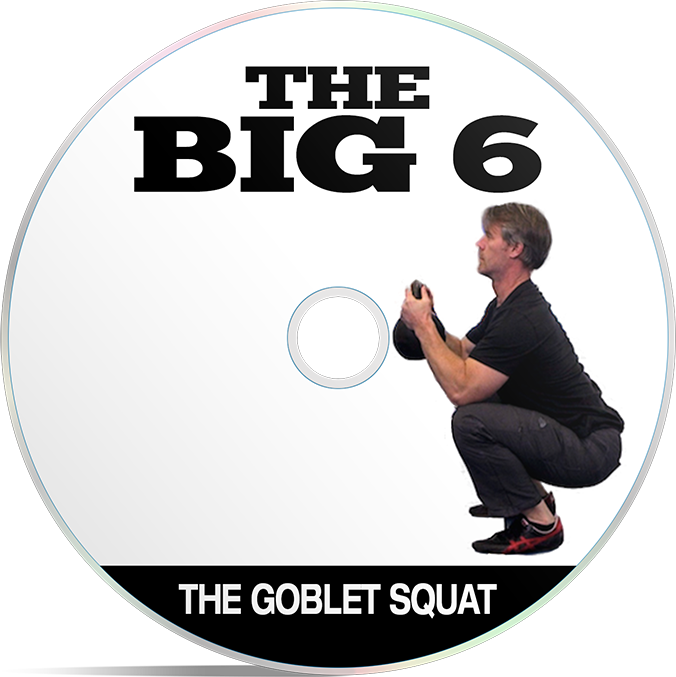
SECTION 4 - THE GOBLET SQUAT
- Discover the top 3 reasons you NEED to be doing the Goblet Squat (including re-learning to use some of your most important muscles)
- Explore 3 different ways to hold the kettlebell (doesn’t always have to be by the “horns)
- “Best-for-you” foot placement
- Sitting “down” v. sitting “back” and the best cue to get this right
- Best way to breathe? Two choices.
- The best way to stand up? Not the way you were probably taught.
- Troubleshooting a rounded upper back: 2 simple exercises to regain depth, control, and strength almost instantly
- A simple “child-like” exercise to train you for near-perfect squats (It’s resets the natural curves in your back)
- E ______ to K ______! The KEY positioning pointer for proper alignment to protect your lower back.
- Relieve the nervousness often associated with squatting by using this trick
- Use this simple stretch combined with a little-known abdominal activation drill (no one ever uses these two in conjunction) to unlock your hips - and watch yourself sink into your squat like a Goodfella' with concrete loafers…
- “Real Time” Troubleshooting with our BIG 6 “guinea pigs” so you can see technique changes in others from implementing what’s in these videos and be encouraged yourself
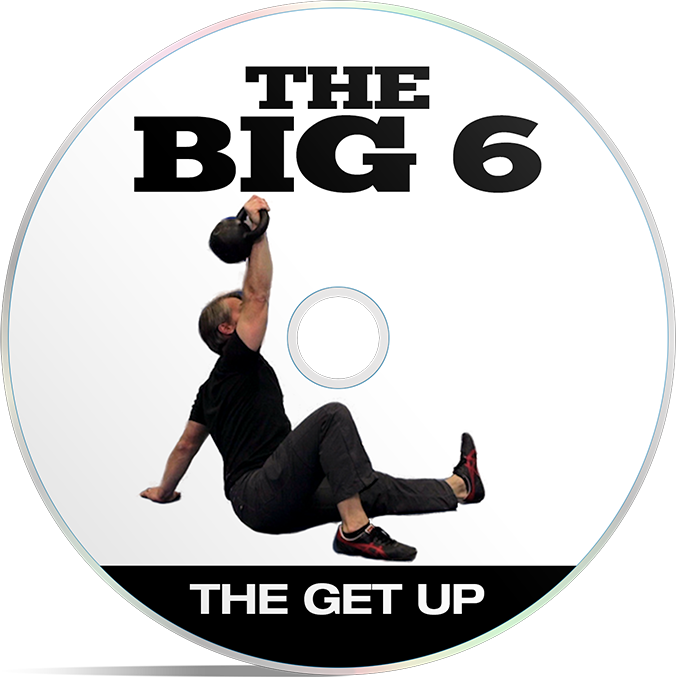
SECTION 5 - THE GET UP
- The top 3 reasons you NEED to do the Get Up: D_____ S _____; S ______ H ______; I ______ A _____
- Why the Get Up has the potential to not only restore your sore and busted shoulders, but make you a better athlete as well (Your rotator cuffs will love them!)
- Discover why the Get Up is a phenomenal calorie burner
- 3 critical safety considerations: Miss these and you’ll need your local dentist’s help
- The 3 best ways to practice the Get Up at home (without even using the kettlebell)
- The “best” set up and why it matters
- How and where to load the kettlebell on your body ( HINT: NOT on your chest)
- Learn the importance of the “Boxer’s Fist”
- A simple way to remember which side of your body is which - so you don’t mess up which side you stand up on (a common rookie mistake)
- 2 ways to get your kettlebell to the opposite side of your body (Keep it away from your face!)
- Use this simple cue to keep your shoulders from “crowding” your ears (A must for shoulder health and correct positioning to get up onto your elbow.)
- The simple 9 step sequence for perfect Get Ups
- Shoulder positioning for safety in the Tall Sit position
- The “step over” method to get your bottom leg into the lunge with your legs parallel (especially if you have sensitive knees)
- How to “find” your hip when getting from the lunge back into the Half Kneeling Windmill position for more stability so you don’t drop the kettlebell on the floor, or worse… Your head!
- How to create a “kickstand” to for greater stability in the lunge position (so you can stand up without overloading your front knee
- Learn the ideal weight placement in the lunge position so you can stand up with ease!
- Why head and eye position matters and how they change during certain portions of the Get Up
- Where to look when standing in order to protect your lower back
- 2 Ways to stand up more powerfully (and one combo)
- Stepping back into the lunge: The best sized step to take for maximum control
- How to keep the heel of your front foot from popping up when stepping back into the lunge and why it matters
- “Real Time” Troubleshooting with our BIG 6 “guinea pigs” so you can see technique changes in others from implementing what’s in these videos and be encouraged yourself
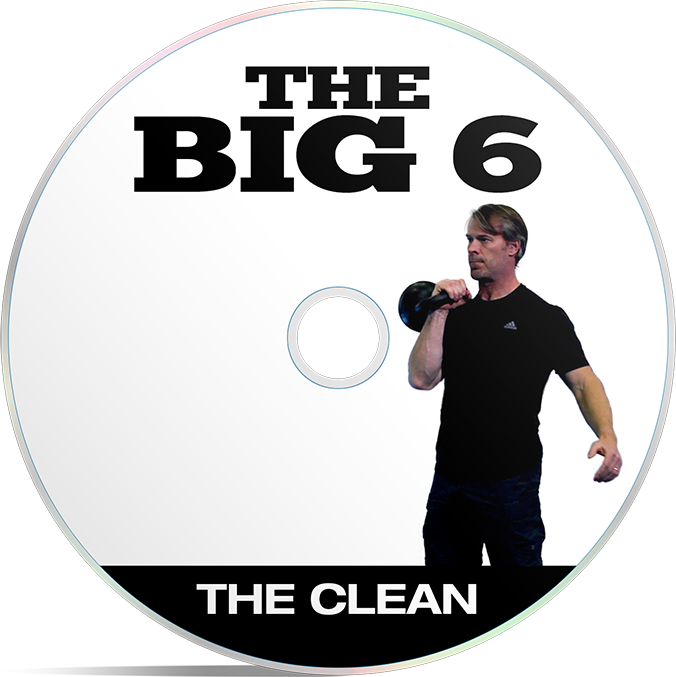
SECTION 6 - THE CLEAN
- Use this “nemonic” to remember how to perform your Cleans with ease ( HINT : This is “great”)
- Begin with the end in mind: The “top down” approach for confident Cleans
- The best way to grip the kettlebell
- Learn where to keep the handle of the Clean in your hand, and why it matters
- How chest position can make you drop the kettlebell or worse - hurt your lower back
- The 3 points of contact of the kettlebell on the body for a perfect rack position
- How your structure dictates your rack position (It’s not the same for everyone)
- How to learn to be comfortable in the rack position
- Learn the importance of “taming the arc”
- 3 simple steps for near-perfect cleans
- How to keep from smashing the KB into your shoulder
- How to keep the KB from smashing the back of your wrist
- Do this to avoid tearing your biceps
- Why the start position of the kettlebell on the floor will help you tame the arc and how to find that position
- How to fix the biggest mistake when performing the Clean
- “Real Time” Troubleshooting with our BIG 6 “guinea pigs” so you can see technique changes in others from implementing what’s in these videos and be encouraged yourself
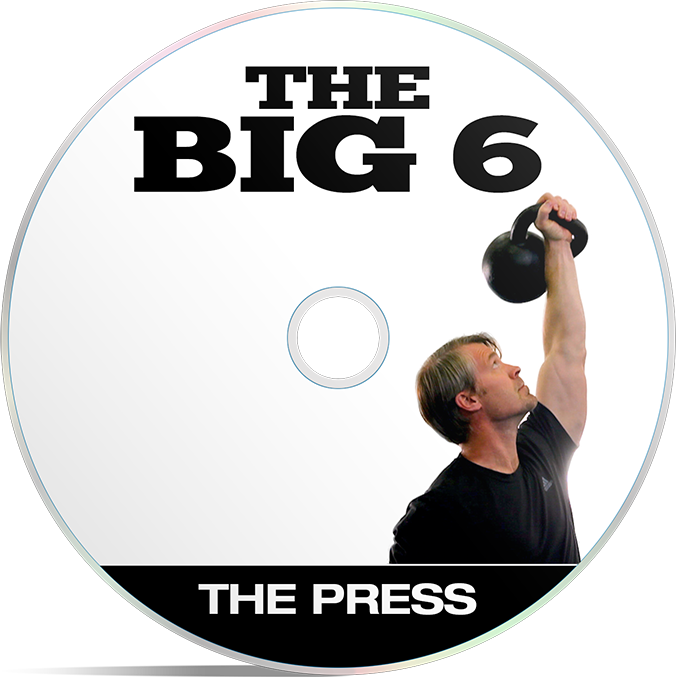
SECTION 5 - THE PRESS
- A special “surprise” about Press technique that you’d never guess
- Learn the best wrist position and why it matters for shoulder and lower back health
- Two grip positions: Which one is best and why? (HINT: For many, one makes the Press easier than the other)
- Foot position
- The shortest distance for a strong Press is…?
- How the Get Up teaches you the “lockout” position
- The connection between the Swing, the Get Up and the Press
- Best positions for you eyes and head that makes your pressing easier
- Look here for a stronger press (Also makes it easier to keep the forearm perpendicular to the floor which keeps the shoulder packed and the powerful lat muscle engaged)
- How thinking about Pull Ups creates a safer Press when getting the kettlebell from overhead to the rack
- Ladies: Learn how exercise videos and group exercise classes have made you weak in the name of “safety” and are actually downright dangerous!
- Why different cues work for different people and how to know which ones you should use
- Use this “elbow cue” for a better descent to the rack
- “Real Time” Troubleshooting with our BIG 6 “guinea pigs” so you can see technique changes in others from implementing what’s in these videos and be encouraged yourself

SECTION 6 - THE SNATCH
- Discover the “prerequisites” for a strong and healthy Snatch
- Learn why the Snatch is a “confidence game”
- The 4 types of Snatch technique, how to perform each, and which is right for you?
- What’s the best grip for the Snatch and why?
- The #1 place you need to learn to be “comfortable” for supreme Snatch confidence
- The best way to tame the arc and why it matters to your grip and lower back
- Here are the 2 biggest Snatch mistakes and how to immediately fix them
- “Real Time” Troubleshooting with our BIG 6 “guinea pigs” so you can see technique changes in others from implementing what’s in these videos and be encouraged yourself
THE BIG 6 took almost 12 hours to film and at least 10 years to whittle down kettlebell technique so a regular Joe or Jane like you could use it and benefit immediately.
We used 4 different cameras and ended up with over 40 hours and 400 GB of footage between them. I was determined to get you to see and experience as much as you can - give you a “workshop feel” - as if you were actually at a live workshop.
My video guy, who’s edited for colleges and is therefore familiar with “educational” filming, then spent the better part of a month tightening up these videos for you, even discarding one of the cameras, leaving us with “only” three different camera shots, to ensure you don’t miss a thing!
When it was all said and done, THE BIG 6 ended up being almost 6 hours long - 5 hours and 41 minutes in total!
Furthermore, people who are using this are seeing -
Near INSTANT Results!
Now I know that’s a bold claim and I wouldn’t blame you if you were skeptical. I would be too.
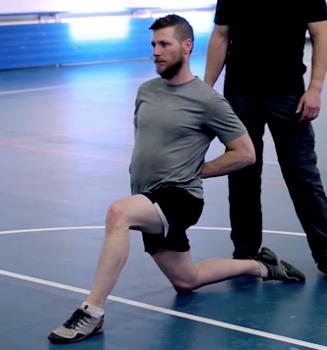
Yet, take a look at this guy here stretching his hips:
This is Michael O’Malley.
He’s actually my “video guy” - who did all the video editing for this project.
And he and his wife were my “guinea pigs” in THE BIG 6.
Since he was editing these videos, he obviously had an opportunity to review the material.
So, he put it into practice.
His results?
Not only did he notice almost immediate improvement in his kettlebell training - eliminating the pain in his bench press-damaged shoulders, his students noticed the difference as well.
They were complaining that Michael was striking and throwing harder, leaving bigger welts on them than normal!
Furthermore, one of our friends, a former US Special Forces soldier and military contractor (who asked to remain anonymous), trains with Michael and likes the kettlebell.
Unfortunately, just like so many other people, maybe even you, he was used to just “heaving” it up - using brute force. (Good old fashioned hard work can’t make up for lack of knowledge.)
So Michael showed him a few of the details he learned about hip drive from the Swing portion and some of what he learned about shoulder positioning in the Get Up, and it gave our friend massively increased power output.
So much so, that in just 3 weeks, he dropped about 10 extra pounds of winter weight he put on unnecessarily!
Imagine that…
Imagine what kind of results you could get in just 3 short weeks from now…
Maybe like me, your lower back will finally stop hurting when you swing…
Or maybe you’ll clean up your Snatch technique - no longer pinching your calluses when dropping the kettlebell into the backswing, so you can ramp up your fat burning, and get into that bathing suit this year…
Or maybe you’ll actually feel your powerful lat muscle - the one under your armpit - for the first time when you Press, making it feel effortless, giving you the strength you crave (and respect that comes with it)…
Only you know the problem plaguing you right now.
One thing’s for sure, if you’re feeling “stuck” with your kettlebell workouts, I can tell you from almost 20 years of kettlebell training experience (and 27 years in the fitness industry) taking a good look at your technique is the first place to start. It’s the first place I start whenever I start training a new client, regardless of how long they’ve been using a kettlebell.
Here's What Some Others Are Saying About
THE BIG 6...
"... Astonishing."
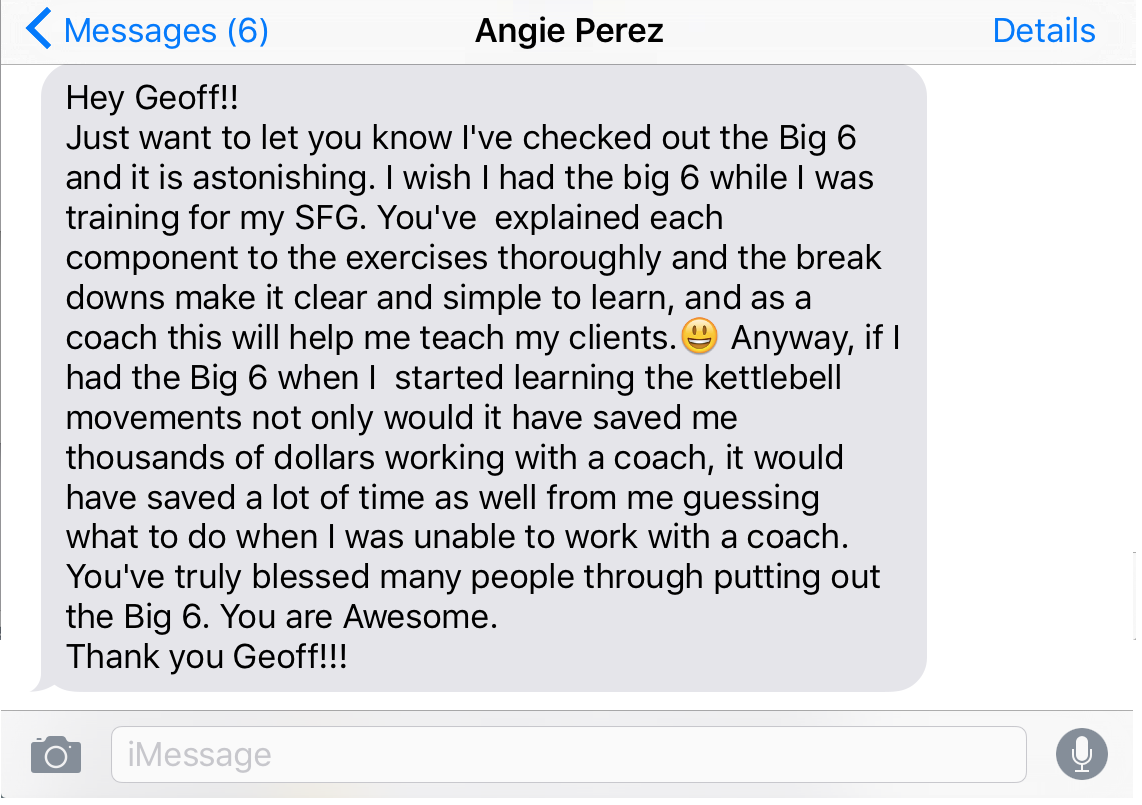
"THE DEFINITIVE Kettlebell Instructional Videos..."

"At Last!"
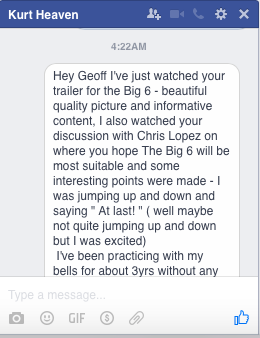
This, From An Old College Friend...

“This Sounds Amazing, Geoff!
But How Much Is It Going
To Cost Me?”
Truth be told, the amount of prep time, film time, and editing were pretty intense.
For example, there was so much film, my video guy actually had to give me a thumb drive to mail to my tech guy, so he could put THE BIG 6 up on my server. There was so much material we couldn’t transfer it using the traditional digital services.
So there is a lot of high quality instruction in here.
And, if you came to see me for personal one-on-one help with your kettlebell technique, you’d pay $150 per hour for the simple reason that I can diagnose and fix your problems usually in 5 minutes or less.
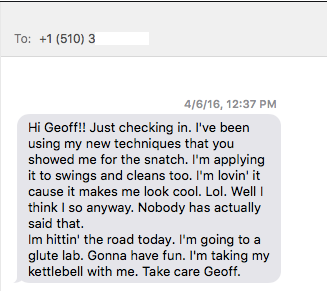
For example, within 5 minutes of working with a client demonstrating her Snatch technique, I’d diagnosed it and given her the necessary cues to fix it.
It was simply a case of knowing what to look for. And in her case, it was where her weight was distributed in her feet.
(There’s a snapshot of a recent text from her. I’ve blocked out her name to protect her privacy.)
That’s the type of information you’ll find in THE BIG 6.
So if you spent the better part of six hours with me teaching you each of these kettlebell exercises or fine-tuning any part of them, it would cost you $900.
And if I custom designed your kettlebell training program, like I did for the lady I just told you about, which includes two 15 minute video coaching sessions per month, that would cost you a minimum $297 each month.
If you decided to go down and meet with your local kettlebell instructor, you’d pay upwards of $65 per hour.
Unfortunately, there's a very good likelihood that he or she doesn't know what I know, because chance are better than good he or she doesn't have a background in Olympic Weightlifting, overcome the amount of injuries I have, or had over 25 years of experience.
And if you decided to use just a regular personal trainer to help you with your technique (Very bad idea… Trust me… I could tell you stories about the trainers at my wife’s gym that would make your hair stand on end…), that too would cost you upwards of $65 per hour.
And if you attended a kettlebell workshop to learn THE BIG 6, you’d pay at least $250 - maybe more, depending on the caliber of the instructor, which is a half or one-day event - so you better take great notes...
And like I mentioned before, there isn’t, as far as I’m aware, anything even remotely comparable on the market today for this detail of kettlebell instruction.
(I sell a 3.5+ hour advanced kettlebell instructional series, Kettlebell STRONG!, for $99 and THE BIG 6 is another 2 hours of instruction…)
And that's why I invite you to -
Put THE BIG 6 To The Test
For The Next 30 Days

I'm so sure THE BIG 6 will improve not only your kettlebell technique, but also boost your strength, I want you to fully review, rewind, and practice every single video as much as you want for the next 30 days.
If you can't document noticeable improvement in your power - crisp, more explosive swings, cleans, and snatches... And your joints don't feel better, looser, less tense or less strained... And your strength doesn't improve - you haven't put more reps on your squats, get ups, and presses... Then I will give you a full, courteous 100% refund.
So you can see, all the risk for your success is on me.
All you have to do now to take your kettlebell training to the next level is click on the big green button below.
$397
$99
The Way I See It, You Have 3 Options
Option #1: Do Absolutely Nothing And Stay Exactly Where You Are Right Now.
If you can handle everything about your kettlebell training staying the same as it is for you right now -
... Low back stiffness from swings...
... Shoulder tightness during get ups and presses...
... Elbow soreness from not taming the arc on your cleans and snatches...
... Aching knees during your goblet or front squats...
Or maybe your military press has stalled out and gone nowhere for the last 6 or 12 months - or worse - years...
... Or you've been trying to hit the 100-mark in the 5-Minute Snatch Test but keep falling short...
Then maybe you don’t need this THE BIG 6.
But if you’d finally like to make some real progress - crisp, explosive pain-free swings and snatches that build your stamina... Strong, confident presses, that strengthen your arms and shoulders... Each giving you that feeling of control, that leaves you with two other options…
Option #2: Do It Yourself.
You can try to figure this out all by yourself - watching endless YouTube video tutorials by genetic freaks who look great in spandex and tight, or no shirts, but can't teach their way out of paper bags...
... Hoping that what you learn you can actually use and won't hurt you...
Or you can cough up $65 to $100 per one-hour session with your local kettlebell instructor hoping because he or she is "certified" that you're going to what you need in one session and that you're not being "milked" so you "have to" come back for more...
If you’re willing to spend hours, days, weeks, months, or even years - like I did, you might get lucky and figure this all out on your own.
Option #3: Let Me Do The Heavy Lifting For You.
I’ll put my proven, THE BIG 6 to work for you.
Simply press ‘play’ and follow along.
All you need to do is press ‘play’ on the videos, watch them, and then do what I show you. Plus, you'll see "rank beginners" implement these techniques and succeed, giving you the confidence that these will work for you too.
Then, test out your swings, get ups, goblet squats, cleans, presses, and snatches and see how much more powerful, stable, stronger, and pain free they are.
Practically everyone I’ve worked with notices one or more of these three things almost instantaneously:
- More explosive swings
- Stronger, more stable presses
- Easier, deeper squats
Of these three options, ask yourself…
Which Is Going To Be Easier For You?
You see, there are two types of people in this world…
Dreamers and Doers.
Dreamers are those who dream about things changing... about being lean, strong, and having lots of energy and using their kettlebells to create the body they truly desire - but never quite take action. Something always comes up...
And Doers - Those who are real action takers - who grab life by the horns - who do what it takes so they can be active, healthy, strong and maybe even feel young again.
Most people will tell you they want to change...
But we both know very few will actually do what it takes to make it happen.
It’s easier to stay where they are and accept it as “part of life”…
Only you can decide what's right for you...
Me?
I’m off to play with my kids and work out.
To Your Success,

P.S. Learning how to use kettlebells or refining your kettlebell technique so that you don't hurt yourself can be time-consuming and hit-or-miss if you're searching YouTube...
And costly and inconvenient if you're meeting in-person with a kettlebell instructor or personal trainer.
THE BIG 6 is the fastest, easiest way to learn how to use kettlebells and refine your technique apart from learning in person from an instructor. It shows you the fastest, simplest, and easiest way to refine your technique from the comfort of your own home, plus -
Unlike training with an instructor, you can always go back and review THE BIG 6 videos any time you want, anywhere you want. This means faster results for you.
P.P.S. Many of my Private Coaching Clients are Trainers and Certified Kettlebell Instructors. I teach them these techniques and they are amazed at the instant changes they see in there strength and power. I'm betting you will be too.
P.P.P.S. Remember, you're covered by my 30-Day, No-Risk, 100% Money Back Guarantee. If you can't document noticeable improvement in your power - crisp, more explosive swings, cleans, and snatches... And your joints don't feel better, looser, less tense or less strained... And your strength doesn't improve - you haven't put more reps on your squats, get ups, and presses... Then I will give you a full, courteous 100% refund.
FAQs
Q: Is THE BIG 6 Digital Or A DVD Set Sent In The Mail?
A: It's 100% digital. You'll have immediate access upon purchase. And you can watch it on any device - smart phone, tablet, or computer.
Q: How Long Will I Have Access To THE BIG 6?
A: Forever. As long as I keep the site up.
Q: Can I Download The Videos?
A: Yes.
Q: Is THE BIG 6 Good Preparation For A Kettlebell Certification?
A: Yes. You will arrive at your certification with clean, crisp, kettlebell technique. What you learn at your certification may differ, and that's ok. You will have more tools in your tool belt.
Q: Can Women Benefit From THE BIG 6?
A: Of course! Why wouldn't they? Everyone using a kettlebell will benefit!
Access THE BIG 6 Now.
DISCLAIMER: The claims made in this letter assume that you will actually use the product. No promises or guarantees are made if you do not follow instructions or do not watch the videos and apply the techniques. If you are that kind of person, please do us both a favor and keep your money.
Terms of Use | Privacy Policy | Contact
Copyright 2020 and Beyond. Sozo, LLC. Worldwide Rights Reserved.